|
|
The Smith Home
Our largest project - finished
in 2009
|
|
|
Master Bedroom
Dresser How to build a drawer

|
Fairwinds
|
We first visited Fairwinds in
1994, when my Uncle and Aunt, George and Vonnie Sutherland, hosted a family
reunion for their 50th anniversary at their home just north of Fairwinds.
Part of the fun was a family golf game at the challenging Fairwinds Golf Course,
where we were impressed with the golf course, the great houses in the
neighborhood, the beautiful scenery, and Peter Sutherland's hole
in one on the sixth. It never occurred to Steph or me that we would one
day live here. What a beautiful
area! |
| |
|
|
|
|

|
|
|
|
Fairwinds GC |
|
Ninth green and first fairway |
|
|
|
|
|
|

|
|
|
|
Little Qualicum Falls |
|
Great hiking trails all through this Park. |
|
|
|
|
|
|

|
|
|
|
Sand rats |
|
The 2004 Parksville sand castle competition |
|
|
|
|
|
|
|
|
|
|
|
|
|
Hike from Cable Bay leads to an overlook of Stuart Channel and Mudge Island |
|
|
|
|
|
|
|
|
|
|
|
|
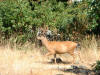
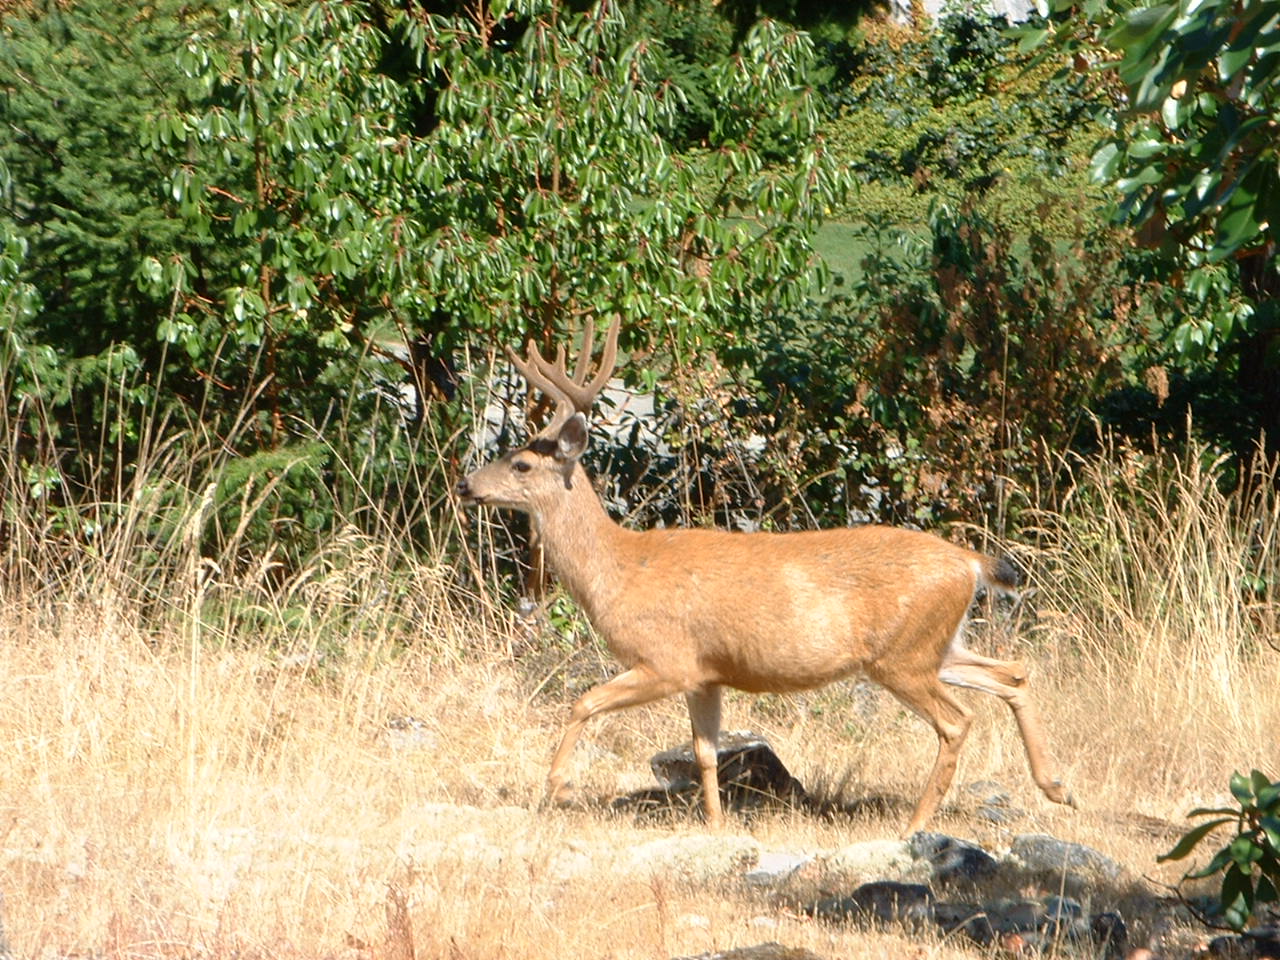
The stag who lives in our front yard |
|
|
|
|
|
|
|
|
|
|
|
|
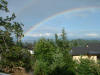
Double rainbow after a summer rain |
|
|
|
|
|
|
|
|
| |
When we visited Maureen and David
in 2000, shortly after they had moved to Nanaimo, we came out to Fairwinds to see how it had changed in the interim. We couldn't believe
how many great lots were available and how reasonably priced (especially in
US$!). With M&D's help in choosing, we made an offer to the sales agent.
I told him that this was an impulse buy that was unlikely to survive our
return to California the next day. That wasn't really true, as we had
fallen for this place, so we were really pleased when the agent persuaded the
reluctant owners to accept our offer. |
| |
|
|
|
|

|
|
|
|
Maureen & David Thomas' first home in Nanaimo |
|
|
|
|
|
|
|
|

|
|
|
|
Thomas view south |
|
Nanaimo Bay. |
|
|
|
|
|
|
|
|
|
Planning
Top |
The plans for the house started
the day we bought our lot. I had an idea for the style
and shape of the house when we were exploring the lot and I asked Steph to drive
the first leg of the trip back to California so that I could get our ideas down
on paper.
The next step was to ask a local surveyor, Peter Mason, to
do a topological survey.
This gave us a plan showing contour lines for every 2' of elevation
change, as well as major tree locations. I traced the contour
lines onto 1/4" plywood, cut, and stacked the sections to give us a
1/4"=2' scale model of the lot. Once the lot model was
finished, we could finish our house design and see where our house
should be located. I build a balsa model of the house and "dug"
out some of the plywood to provide a level spot for the house model.
Seeing the house in 3D gave us more confidence in our design and
ensured that the house would blend into the landscape. |
| |
|
| |
A lot of people
contributed to our design in the next couple of years, but we are most
thankful to our good friend Judith Paul, who gave us many ideas, including the curved stairs leading up
to the panoramic view across the great room and a much better entrance into the
upper bedroom area. (Of course, the curved stairs caused all involved in
building many headaches, but the results are worth it).
When we were
finally ready to build, we asked Peter Jorgensen to take our sketches
and come up with a plan that could be used for building. He added a tremendous
amount of experience to the final result with many significant
improvements over my initial plan.
|
| |
|
|
|
|

|
|
|
|
Ian's original design |
|
Upper floor |
|
|
|
|
|
|

|
|
|
|
Jorgensen house design |
|
Upper floor |
|
|
|
|
|
|

|
|
|
|
Jorgensen house design |
|
Lower floor |
|
|
|
|
|
|
|
|
Lot Preparation
Top |
Peter helped us arrange a contract with Tim Rann, who agreed to start
construction February 3, 2003. He agreed to build the house to lock-up
(lockable doors and drywall installed) and he told me that it would take him
17 weeks. After that, I planned to finish the house myself. Not
only would I have a lot of fun, but it would save some money and I would
have projects to work on for years! We were
concerned that the natural environment of our property
might be damaged during construction, so
we hired Victoria Drakeford, a local landscape architect, to create a plan
for the finished lot. Once that was done, she, Peter Jorgensen, and
Tim Rann met to discuss how to build the house while minimizing the impact
to the property. As an example of how seriously Tim took our concerns,
his crew carefully set aside the moss on the route from the house
to the service feeds, cut a trench in the rock by hand, laid the service
piping, and recovered the trench with the moss.
Tim started rock excavation on schedule and a couple of weeks later was
laying foundations. |
| |
|
|
|
|

|
|
|
|
The Landscape Plan |
|
By Victoria Drakeford |
|
|
|
|
|
|
|

|
|
|
|
Clearing rock for the foundation |
|
|
|
|
|
|
|
|
|
|
|
Top |
Framing is the most exciting time for the owner of a house under construction. Within days, you start to see a real house! I
was able to come up twice from California during construction - at
the start of framing and just before the electricians started. |
| |
|
|
|
|
|
|

|
|
|
|
Garage and craft rooms framed |
|
|
|
|
|
|
|
|
|
|
|

|
|
|
|
Curved stairs from the foyer |
|
|
|
|
|
|
|
|
|
|
| |
And once the roof and the siding goes on and the windows go in, it REALLY
looks like a house. |
| |
|
|
|
|

|
|
|
|
Dennis and Tom on a break |
|
|
|
|
|
|
|
|
|
|
|
|
| |
It is amazing how many things go into the walls. Plumbing lines, phone
lines, electrical, central vacuum, heating and ventilation ducts, LAN
wiring, audio/visual wiring, security wiring, intercom wiring, gas lines,
blocking, vapour barriers, and insulation. |
| |
|
|
|
|

|
|
|
|
James installing heating ducts |
|
|
|
|
|
|
|
|
|

|
|
|
|
Wall between garage doors |
|
- typical busy wall |
|
|
|
|
|
|
|
|
|
Top |
And then the drywall is installed and taped.
What more can you ask from a builder: great workmanship, highly
collaborative, positive attitude, on schedule, and on
budget. Thank you Tim!!
After that, it was my turn.
Steph and I moved from California to Fairwinds on June 20, 2003 and moved
into our 23' travel trailer with our two cats. Cozy.
I worked on the house for 10 or so hours most days until September to get the house to a stage where we could live
in it. Namely a bathroom, a working kitchen, and a place to sleep.
Of course, I had to start with the workshop, because that's where everything
happens. At the end of every day, a welcome hot tub! |
|
|
|
|
|

|
|
|
|
Our trailer at Nanoose Creek Campgrounds |
|
|
|
|
|
|
|
|

|
|
|
|
Step 1: paint the garage/workshop |
|
|
|
|
|
|
|
|

|
|
|
|
A messy, but happy spray painter |
|
|
|
|
|
|
|
|
|
|
|

|
|
|
|
First usable thing in the house - the hot tub! |
|
|
|
|
|
|
|
|
|
|
The Kitchen
Top |
The next step was the kitchen. The first thing that I did was to
install the under tile electric heating grid, which was time consuming. The
wire coils hither and thither around the room and then I filled in the
blanks with 3/8" plywood. Next step was to cover everything with
mortar and then lay tile on top of that. Two weeks later, we had a
floor! All of that to get to the part that I had imagined I would be doing
-- building the kitchen cabinets. What fun!! The biggest challenge
was installing the oven. How do you hoist up a large 300 lb box and
slide it into a hole in the wall by yourself? I finally figured out
a way to do it. I tipped over the oven and Steph put a 3' 2x4 under
the side. Then I tipped it the other way and did the other side.
Then backwards, forward, left. and right repeated until the oven was
PRECARIOUSLY two feet off the ground and more or less in line with the oven
cavity. I slid it backwards and it went in as smooth as silk.
The 650 lb fridge was less of a problem because it didn't have to be
elevated. I just used a dolly to wheel it into place. (I will
never cease to be amazed that movers do this for a living!). I designed the kitchen specifically for us. For example, we
each have our own sinks on counters of different heights (forearm at 45°
with hand resting on the counter). Although we watched our budget in
other areas, we didn't skimp on anything in the kitchen. I installed a
Viking gas range with grill, 42" built-in fridge, and Thermidor double
ovens. The garbage compactor, recycling bins, and microwave are all
built into the cabinets. It's a large kitchen with plenty of storage
space, including a walk-in pantry. |
| |
|
|
|
|
|
|

|
|
|
|
Floor heating grid installed |
|
|
|
|
|
|
|
|
|

|
|
|
|
Steph's lower cabinets started |
|
|
|
|
|
|
|
|
|

|
|
|
|
Getting ready for the fridge |
|
|
|
|
|
|
|
|
|
|
|
|
|
|
|
Top |
During that first summer we contracted with Dale Cunningham to complete our
landscaping. The first step was to have Tim Rann finish his contract which
was to shape the property with his large equipment contractor. This
"landscaping day" included the digging and preparation for the large ponds
that we had planned for the front "magic garden". The picture below
shows the rubber liner that took six people to install. Later, we learned
that ponds have a few drawbacks. Raccoons and even otters eat
the fish and regular maintenance is needed to remove leaves and debris from
the ponds. We had imagined fish swimming happily in our pond and we
really don't like yard maintenance, so we scrapped the idea of a pond.
I found someone to take away the liner and we filled in the hole. Note
the maintenance-free dry creek that replaced it! |
|
|
|
|
|

|
|
|
|
Victoria directing the burm construction |
|
|
|
|
|
|
|
|
|
|
|

|
|
|
|
Soon to be no more pond starting to fill |
|
|
|
|
|
|
|
|
|
|
|
|
|
Top |
The next big project was a real challenge - making curved balustrades (guard
rails) and a hand rail for the
stairs. I'd never done anything like this before and didn't know the
best way to do it. Steph came up with the idea that we would use wrought iron
fences (upper and lower) with wooden cap and newell posts. We contracted
with George Ewing to do the iron work and he suggested that I could use
the pre-painted version as a jig to do the laminate glue-up. That worked
great. I glued together many strips of thin re-sawn cherry wood bent to suit
and clamped to the railings. For the hand rail, I made wooden clamps for each
step and glued the thin strips to shape by clamping them against the wall. |
| |
|
|
|
|

|
|
|
|
Stair clamps for the railing glue-up |
|
|
|
|
|
|
|
|

|
|
|
|
Lower guard rail finished |
|
|
|
|
|
|
|
|

|
|
|
|
Upper guard rail finished |
|
|
|
|
|
|
|
|
|
|
|
Top |
The work of which I am most proud is our front door. Patterned after a
commercial door that we liked, I used raised panel techniques to create two
identical doors from 3/4" cherry wood and glued them back to back with
a thin sandwich in between to make up the required door thickness. The
biggest challenge in making a door is to ensure that it is not warped in any
way. By careful wood selection and a lot of care during construction,
I managed to achieve that. The door is not perfect, but I'm happy. |
| |
|
|
|
|
|

|
|
|
|
Bob Popple helps lift the 100 lb door into place |
|
|
|
|
|
|
|
|
 front door!")
|
|
|
|
A finished (almost professional) front door! |
|
|
|
|
|
|
|
|
|
|
|
Top |
One of the more important aspects of a home is the interior design. We
brought almost all of our furniture and all of our artwork from California,
but how would we choose wall colours? We had the good fortune to have
Deirdre Love recommended to us who showed us how to design the house colour
scheme around what we had, what we liked, and what worked together.
However, after painting the garage/workshop, I concluded that not only did I not like
painting too much, I was not very good at it. So I asked Tim Rann to
take it on and he selected Lawrence Reeves to do the work. He did a
great job and still comes back for touch ups now and again. Sometimes
you just have to recognize your limitations!
Other major projects of our
first year include the foyer tile job, two guest bathrooms, the built in
bookcase in my den, and setting up the home theater and in-house
audio/visual. On the latter project, our grandson, Jason, visited us and helped me. He has since started and apprenticeship in the field
and I expect he will be very successful, judging from the way he picked it
up so quickly.
The final projects included the master bedroom built in dresser,
the nook bookcase, and bookcases and cabinets for Steph's room.
This wonderful project
kept me busy for six years!! |
|
|
|
|
|
|
|
|
|
|
|
|
|
|
|
|
|
Home Theater doors, laminated maple and cherry |
|
|
|
|
|
|

|
|
|
|
HT chairs - motorized, NASA foam - easy to fall asleep! |
|
|
|
|
|
|
|
|
|

|
|
|
|
A/V closet - house sound and video control |
|
|
|
|
|
|
|
|

|
|
|
|
View coming up the stairs |
|
|
|
|
|
|
|
|
|
|

|
|
|
|
Lower guest bathroom vanity |
|
|
|
|
|
|
|
|
|
|
|
|
|
|
|
Top |
When we bought the lot, we thought that we might have a limited view of the
Georgia Strait, so we were very happily surprised to find that our view was
quite decent. We have since visited many homes in Fairwinds and have
discovered that a lot of them have good views, some great views, but they are
all different. The original developers did a wonderful job of laying out
the property to take maximum advantage of view lines. The fabulous
thing about the view is that it is constantly changing. Cloud cover,
lighting conditions, season, and time of day make large differences.
My favourite is at night, sitting in the hot tub, with stars overhead and
the city lights in the distance.
The first winter after we moved in brought a snow storm that delivered 6" of
snow that lasted three days. While it was here, we had the most
fantastic views, with everything covered in a soft white and unbelievable
light. |
| |
|
|
|
|

|
|
|
|
View of Nanaimo in the summer |
|
|
|
|
|
|
|
|

|
|
|
|
Winchelsea Islands in summer |
|
|
|
|
|
|
|
|
|
|
|

|
|
|
|
Garden view from Steph's room |
|
|
|
|
|
|
|
|
|
|
|
|

|
|
|
|
View from the kitchen window |
|
|
|
|
|
|
|
|
|
|
|
Top |
Building the wine cellar was a lot of fun. When we designed the house,
I intended that the original stand-alone 200 bottle wine cabinet that I
built years ago would be housed in the Utility room, and we did use it that
way for the first couple of years. When we started visiting the
Okanagan Valley after we moved here, I realized that this was not going to
be big enough, so I commandeered a corner of the workshop and designed and
built a small room where we could store 750 bottles. The room is
constructed with 6" insulated walls, a built up insulated floor, and
insulated ceilings. It has a cooling unit that keeps the wine
temperature at a constant 55° F (I never have gotten used to celsius!).
The wine racks are kiln-dried, clear cedar. |
| |
|
|
|
|

|
|
|
|
How about that grape colour that Steph chose! |
|
|
|
|
|
|
|
|
|
|


 front door!")